We have made it to our 3rd day of introducing writer’s workshop to our students. As we continue this series on writer’s workshop, we will look at introducing students to the tools they will need to be successful.
It is a good idea to begin the mini lesson part of this lesson reviewing yesterday’s lesson about the parts or writer’s workshop. If you missed this blog post you can check it out here.
Introducing Writing Folders

After calling students to the carpet and reviewing yesterday’s mini lesson, take a moment to and have students share what they think are some of the tools a writer needs. This would also be a good time to practice talking with a partner during mini lesson time as they share with each other before students share with the whole group.
Have a sample of a writing folder and show students the different parts. Show them sections they can use for common misspelled words. Discuss where they will place work still in progress and finished work in their folders.
For more information on the ideas for parts of the writing folder, check out this blog post.
Pencils and Writer's Workshop

You will more than likely have already introduced students to your classroom management of using pencils in your classroom. It is a good idea to have a plan in place so students know what to do if their pencil point breaks? What do they do if they need a pencil? Having a plan for how to manage pencils in your classroom is a must to cut down on interruption throughout the day.
I use a pencil managment system known as the Great Pencil War. It is a simple managment strategy once you get it started. If you want to learn more about this system then click the image below to learn more about this from Lucky Little Learners I have tried many different strategies through the years, and so far this has become my favorite. I have found that 5 pencils per week are enough.
Notebook Paper

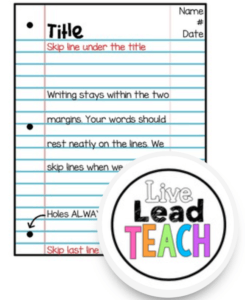
Every year one thing we have learned we need to teach our 2nd graders is the correct way to write on notebook paper, Just like any other skill, this is a skill that will need to be taught if your students have never used notebook paper before. Students need to be taught which side is the front of the notebook paper, how to handle the margins on both side of the paper, and sometimes I have even had students who needed to be taught where the top and bottom of notebook paper is. It seems like a simple thing, but it is a good idea to go ahead and plan what your expectations for this are going to be.
- Do you have certain areas where they will place their date?
- What about titles or headings for what they are writing?
- Do you want them to skip every other line to help with the editing process?
These are all things that students will need to be taught the expectations for.
If you would like to see an anchor chart that may give you some ideas for this, then check out the link below.
It is also a good idea to plan for what students will do when they need more paper to write on during writer’s workshop. I always keep extra notebook paper in a basket in an area in the classroom. Students are taught that when they need more paper they can just go to this basket to get what they need.
After our mini lesson, students will spend time writing. This will be a good time for students to practice their new skill of writing on notebook papers. They could even write about what they have learned so far about writer’s workshop. The most important thing is to make sure students have some time to practice writing and also come back together to share what they have written.
Next time we will look at learning about where writer’s get ideas for their writing.
Until then…
